

The trip’s objectives: Mt. Williamson, left, and Mt. Tyndall.
Prologue: You’d be advised to skip this self-indulgent section
For two years Michael, my intrepid Sierras climbing partner, and I had been planning our own version of “Intro to Climbing in the Palisades” by taking on Mt. Sill and Polemonium Peak.
Last year (2012) our plans had come to an abrupt end when I reluctantly had to acknowledge that, after a full season of bike racing, I would be at risk of defaulting on the significant loan I had taken out from the marital bank by asking my wife to work full time and take care of our two kids for a week while I flew out to California for four days of climbing in the Sierras.
This year I would be piggy-backing the climbing trip on top of three weeks of family vacation in California. While patting myself on the back for this shrewd bit of logistical maneuvering I am secretly harboring serious doubts about the final pitches up to Polemonium’s summit. It is notoriously exposed Class 4 and I have not yet read one trip report where the authors were confident to free solo the stretch, universally opting to rope up.
This presents a problem as I have limited…I mean, very little…in fact I have exactly ZERO rope experience beyond seeing some rope once on a trip to Bent Gate to buy trail runners, reading the relevant sections of Freedom of the Hills (the knot tying diagrams are particularly difficult to abstract without an actual rope in hand) and watching a few Youtube videos. A week out from our departure and the learning curve would appear to be as steep and exposed as the pitches in question.
Despite the klaxons of intuition blaring “Don’t do it!”, I hold out hope of not disappointing Michael (an experience rock climber) until I happen to, out of sheer boredom, read the safety chapter of Hiking and Climbing California’s Fourteeners by Stephen Porcella and Cameron Burns:
“The first step towards the use of a rope in safeguarding an ascent is to know proper rope handling techniques. There are many books on this subject, but unfortunately, books cannot substitute for getting out and practicing these techniques.”
Further down:
“…know your own limits…this goes back to our earlier point of knowing when to back down. There have been numerous incidents concerning climbers on the fourteeners where an experienced climber refused to acknowledge slower or less experienced climbers in the group. In almost every experience someone was hurt or killed.”
My intuition is validated. Though I rate myself a decent scrambler and figure a 90% chance of success soloing to the top of Pol, the remaining 10% has only one possible, somewhat terminal outcome. There has already been enough tragedy in the mountains this summer. I e-mail Michael and beg off the choice of target peaks.
He is sympathetic and after a flurry of activity we choose Mt. Williamson and the adjacent Mt. Tyndall as the trip’s objectives. My pitch to Michael is that climbing these two peaks will put us into the 1% of 14er climbers. The reality is that since 99% of all 14er climbing activity in California is centered on one mountain, anyone who climbs any other 14er in California automatically joins the 1% club!
Williamson & Tyndall have a reputation as two of the more remote 14ers in the Sierra. This is mainly due to the 12-mile, 6K’ gain of approach required just to get to the top of Shepherds Pass, where only then do the appropriate faces of each mountain first come into view. Almost every report mentions the grinding nature of this approach, the ensuing crossing of the Williamson Bowl and the 2K’ climb up the gully on Williamson’s standard West Face route. Rather than further dwell on these challenges, I will instead refer the reader to the best report I read on the climb.
Many tackle these mountains by heavy packing into the alpine bleakness of Williamson Bowl. Since both Michael and I merely tolerate heavy packing with gritted teeth, we plan on packing about 10 miles to the forested Anvil Camp, set up base camp and then day hike the two peaks on subsequent days. This will add a few miles and about 2K’ of gain to the total trip stats, but they will be light and fast miles.
I am excited to have in pocket a brand new Canon S110 which I received a day before the trip. It is the first point & shoot I have ever owned and it will have it’s trial-by-fire straight out of the box. No longer would I be limited to embarrassingly dodgy iPhone pics or have to pack & carry a dozen pounds of SLR gear.
Day 1: The Approach
Just shy of Lone Pine, we make the obligatory stop at the [inhaling big gulp of air] Eastern Sierra Interagency Visitor Center, AKA the Taj Mahal of ranger stations. Anyone who has been there has likely seen the unmistakable spires of that other mountain to the west. What I had never noticed before is that if you scan the range just slightly to the north, there’s Williamson and Tyndall.

The Williamson Massif (center) and Tyndall (to the immediate left): obvious though anonymous from Lone Pine.
I wonder how many people standing in this parking lot have any idea that this mountain is the second highest in California?
From the Taj we head to Lone Pine proper for a Subway sandwich. We easily navigate the dirt road to the trailhead at 6,000’ and, after wolfing our sandwiches down, are pounding dust up the trail along Symmes Creek by 1pm.

On the road to the Shepherds Pass trailhead.
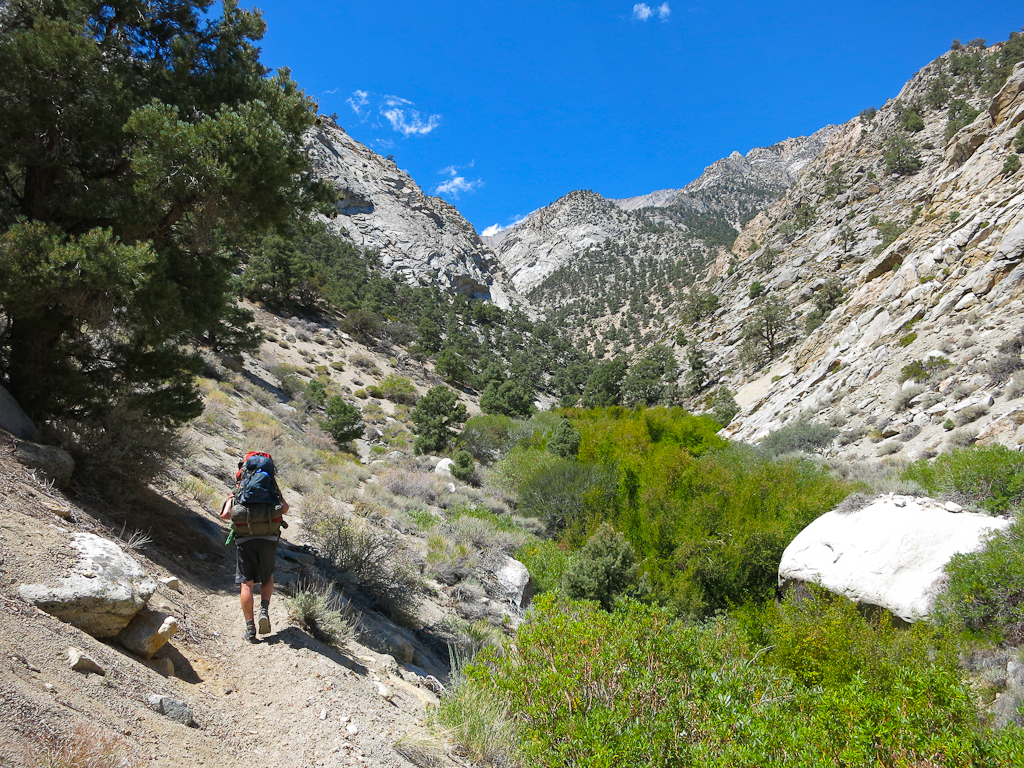
Pounding dust.
Much has been made of the mid-day summer heat on this trail and I am struck by the purely desert nature of the Eastern Sierras at this elevation. We are lucky to have a nice breeze and as the day goes on a merciful amount of cloud cover to keep things relatively cool.
We had been advised at the Taj that heavy flash flooding earlier in the summer had done significant damage to the creek bed and the some of the trail. While this is immediately evident to us as we make our way along the trail, the Forest Service has done en excellent job rerouting small sections of trail and we cross the creek four times without trouble.
I have decided to tackle this trip with only a 1L Nalgene bottle and a filter, so at the last creek crossing I gulp the whole thing down, fill it again and we begin the climb away from the creek and up the 56 switchbacks to Symmes Saddle. Once on top of the saddle, as promised, the northeastern flank of Williamson dominates the scene.

The view from Symmes Saddle. Williamson dominates the entire area.
The rest of the approach is long, but pretty and uneventful. We encounter the first water after the last creek crossing in the form of a stream about a mile before the Mahogany Flat area. I gulp and fill. Once at Mahogany Flat we are fooled into thinking that our arrival at Anvil Camp, just above and ahead a ways, is imminent. In fact it is still two miles to go at that point as the trail gradually ascends some long switchbacks to the right.

Shepherds Creek. Anvil Camp is in the forested area at the upper middle of the frame, still quite a long way away.
Just before Anvil we come across the final washout, a 15’ deep trench filled with an assortment of granite boulders. We leave the trail pick our way up the loose dirt and stones until we come to shallow area suitable for crossing. Good warm up for tomorrow!
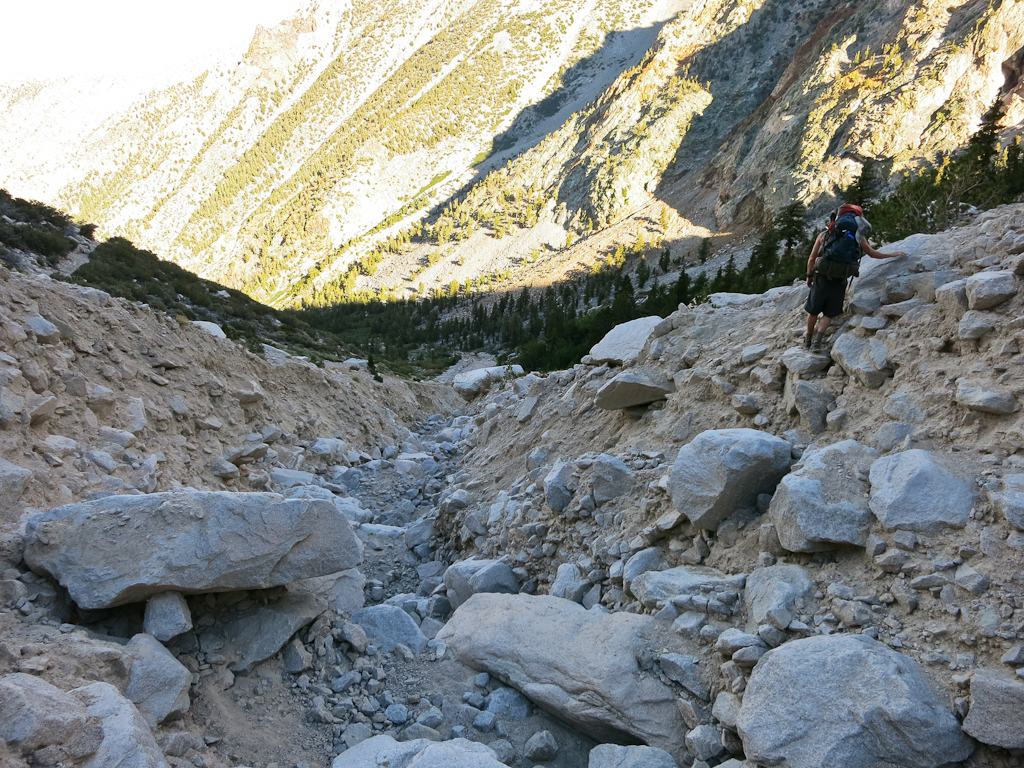
Clearing the final washout of the day.
Back down the other side we rejoin the trail and within minutes are entering the relatively lush environs of Anvil Camp, just shy of six hours since our departure.

Entering the forest just shy of Anvil Camp.
We find a good site before crossing the creek which runs through the middle of Anvil. It is not a gorgeous packing destination by Sierras standards but nonetheless it’s very nice as a base camp with ample shade and the creek nearby as a water source and constant nighttime lullaby. We encounter very few mosquitoes and see none of the mice that had been reported as being a problem here.
It’s also interesting to note that this is the only trip I’ve taken of many in the Sierras where a bear canister is merely advised but not mandatory (we bring them anyway). In fact there isn’t much in the way of obvious wildlife here in general, maybe because it’s high and pretty dry.

Our decent site at Anvil.

Water at Shepherds Creek is only 100 feet away from the campsite.

Nearly accurate map and stats of the day’s route.
Day 2: The Soft Underbelly of The Beast (Williamson)
Nice morning. One of the luxuries of starting the day high up in the Sierras is a relatively late departure time of 7:30am, since we do not have to worry nearly as much about thunderstorms.

Daybreak at Anvil.
Now with our daypacks, we jam through the balance of Anvil, pass treeline and cruise up the nice trial through the numerous moraines that make up the remainder of the trek to Shepherds Pass. Along the way we encounter the first descending hiker we have come across on our trip. He tells us that he managed Tyndall but bailed on the attempt on Williamson because he could not discern the “black stain”, a watermark made by a small cascade on the side of Williamson that, critically, marks the entry point of the gully.
Soon enough we can see Shepherds Pass before us and I have my only “uh oh” moment of the trip. From a distance, the pass looks like a ridiculous slog up a very steep and loose slope.
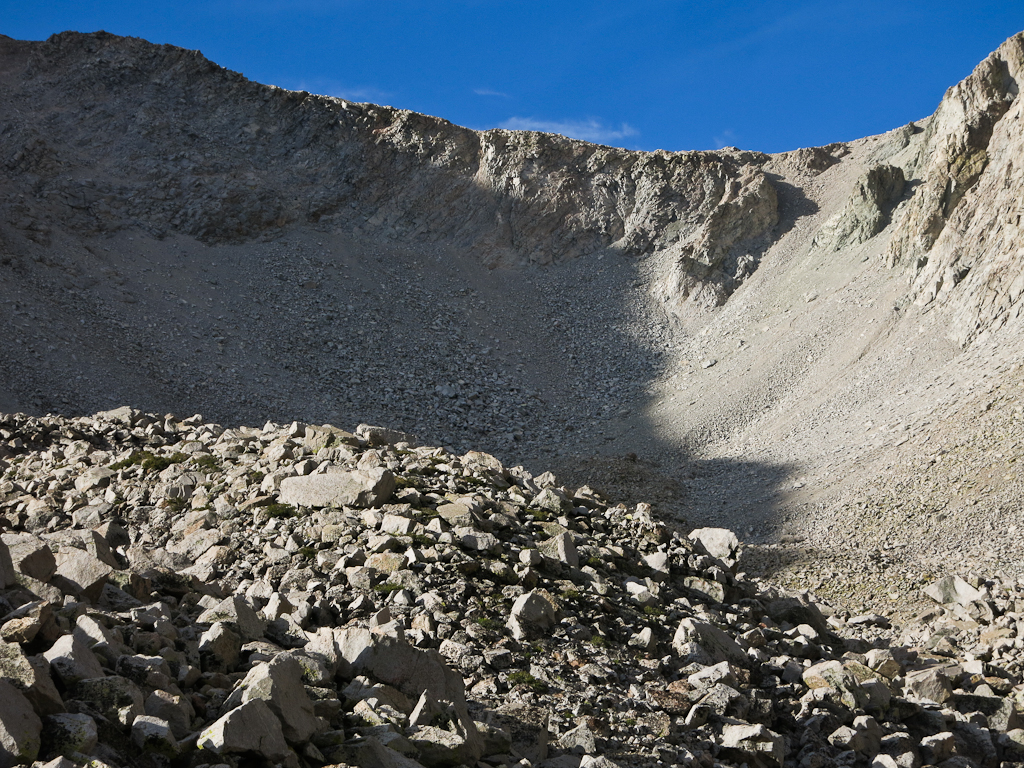
Approaching Shepherds Pass. Trail anyone?
But we come closer and handy switch-backing trail is revealed, of which we make short work.

Halfway up the pass, looking back down the trail.
At the top of the pass we are treated to a killer view of Tyndall to the left. Tomorrow’s intended route—the North Rib—is obvious from this angle at the center of the mountain’s face.

Beyond the pass Mt. Tyndall dominates the background.

A closer view of tomorrow’s route: Tyndall’s North Rib in the center of the frame.
We briefly enter Sequoia National Park before swinging left, working our way across an open, gradual slope toward the rising mass of Williamson and the rim of the bowl. Tip: If you head up the middle of this slope (middle being somewhat subjective in this case) you will arrive at the edge in the approximate area of the use trail that leads down into the bowl. From here Williamson looks like an unassailable fortress, an armored beast. We must find its soft underbelly.

Williamson rising.

Michael pauses at the edge of Williamson Bowl.
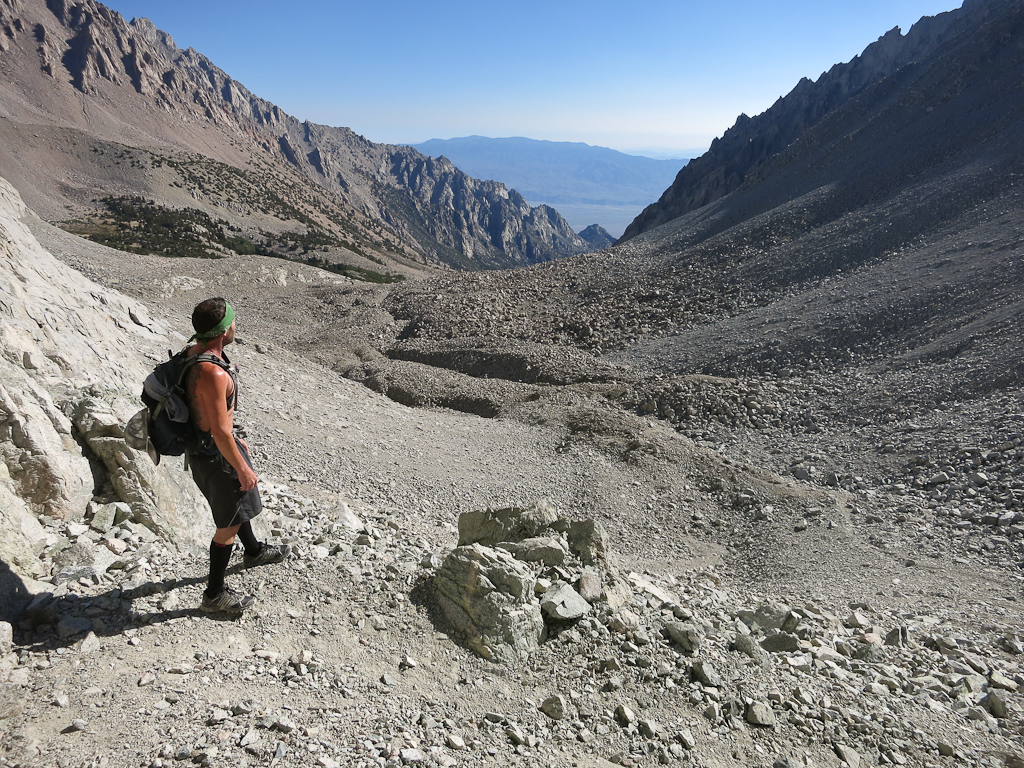
Down in the bowl we pass to the left of the first lake and then trend right. After picking our way up and over the various hills of rock and stone we eventually arrive at the western shore of the second lake where we fill bottles and eat. The black stain is easily visible from this point and Michael and I entertain ourselves with speculation as to how the descending climber could have missed it.

Looking down into the bowl.
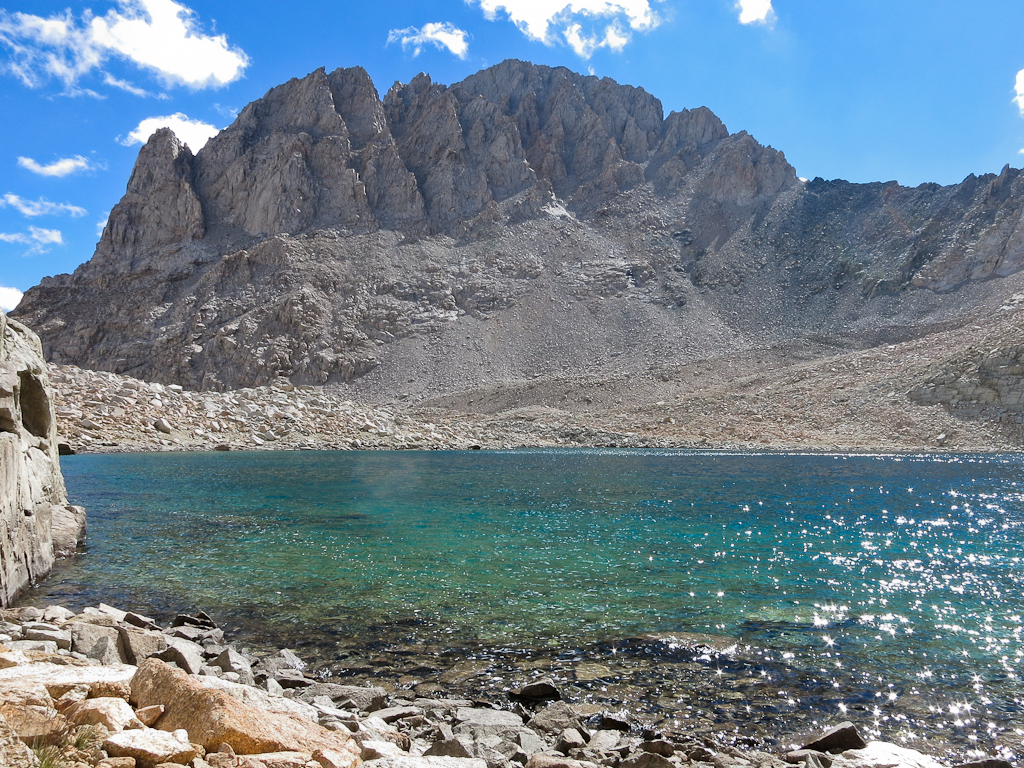
Good view of the ascent route from the western shore of the second lake.
Back on our feet we disagree on the fastest way around the lake so we each take off in different directions to see who’s right. The result is a virtual tie as we meet in the middle and pick our way up a moraine toward the stain, crossing underneath and beginning our climb up the face at what seems to be the optimal point.
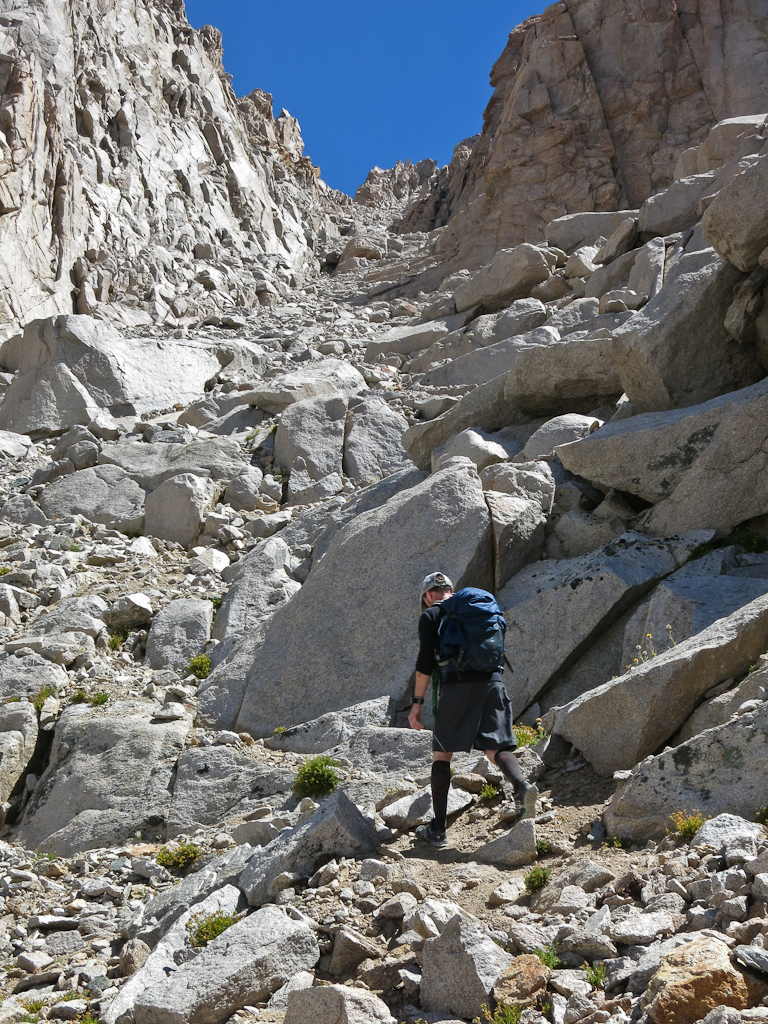
The going is rough here, the steep slope a mass of rubble with no obvious path, just keep going up. We scrape our way past several mounds and as the gradient eases a bit, realize that we are a little too far right of the gully. After some cursing on my part for the wasted effort we traverse over and begin the ascent of the gully proper.

Negotiating the rubble of Williamson’s lower flanks: say hello to the black stain (upper left) as you pass!
It’s a grind. We try to stay right where the rock tends to be a little more blocky and solid, but the loose stuff is unavoidable and unpredictable as seemingly solid stones suddenly shift underfoot. After about an hour of this struggle an internal conversation begins as fatigue begins to set in.
“Why are you doing this again?”
“It doesn’t matter, you chose to do this–waited two years to be here–so just shut up and keep going. Any day in the mountains is a good day.”
Grinding up the gully.
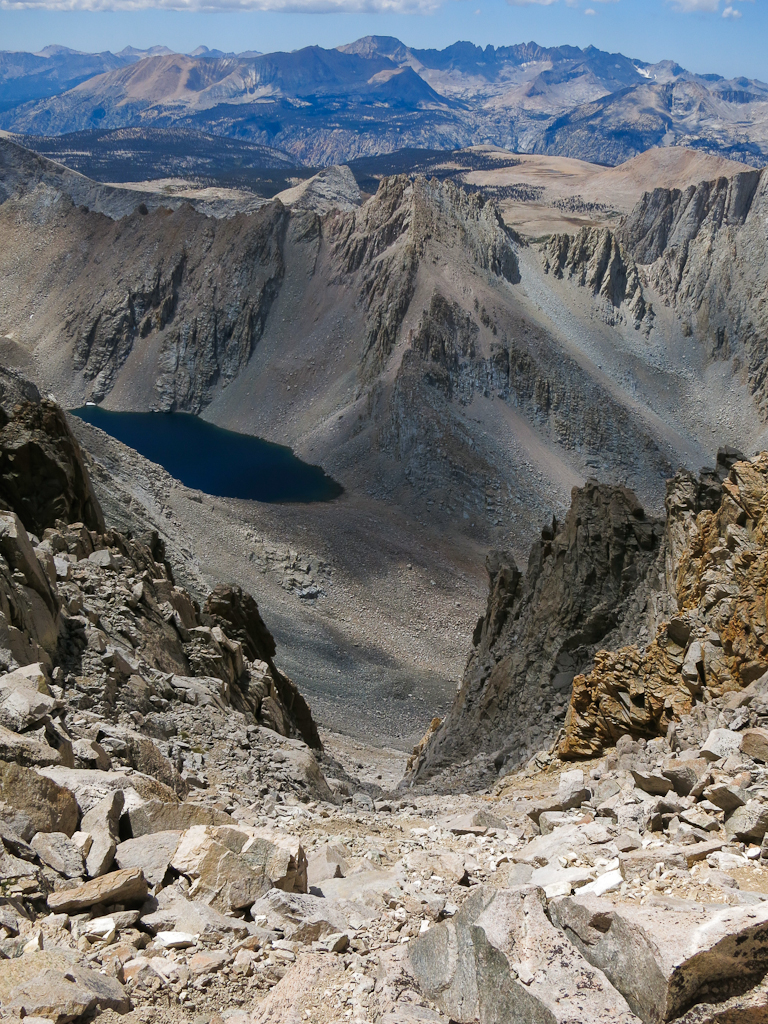
Looking back down from high up in the gully.
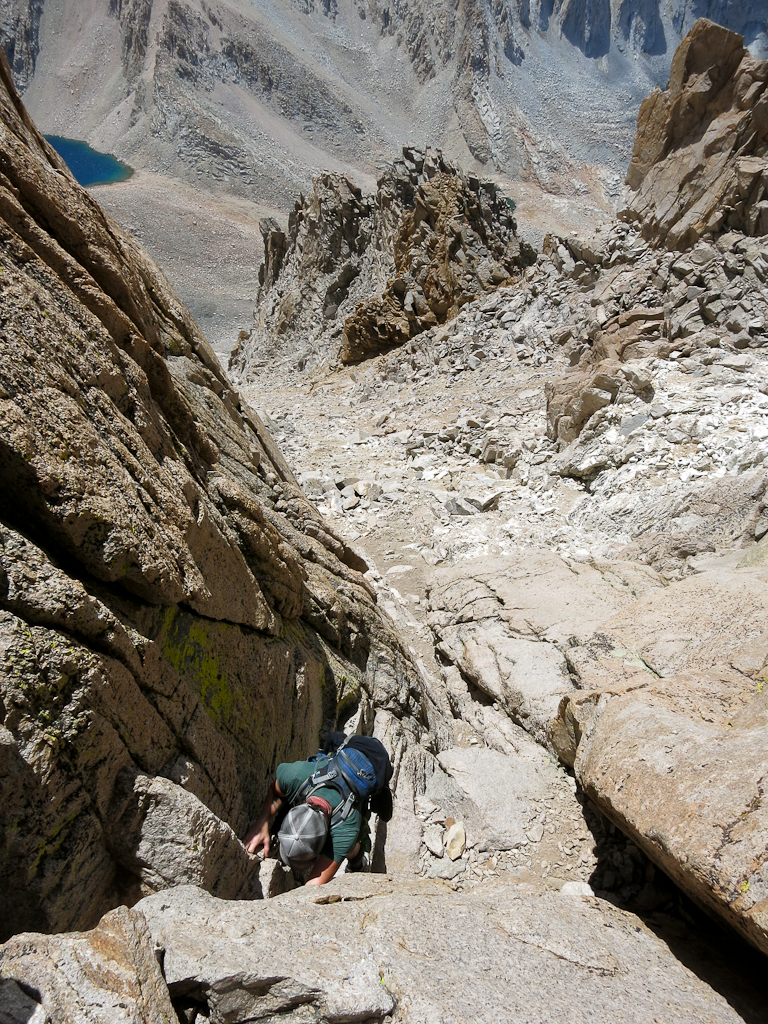
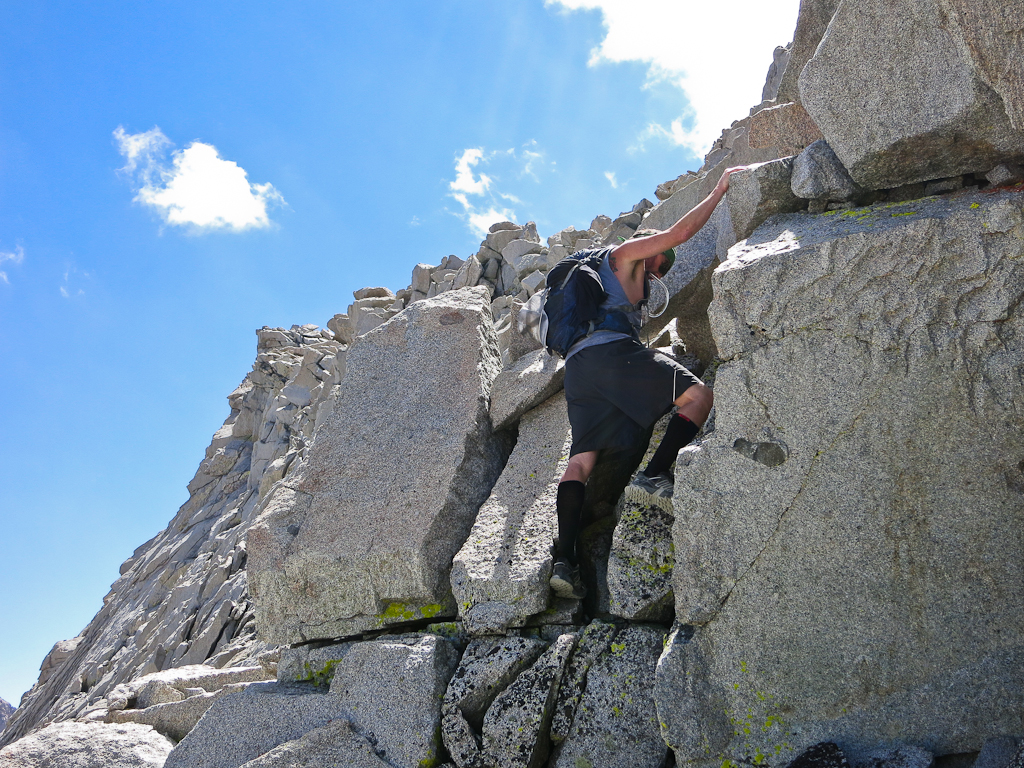
Finally, after nearly an hour-and-a-half straight uphill, we arrive at the chimney, the way out of the gully. Much has been made of this feature. I will only say that is was the most technically challenging and so, fun, section of the whole four days of climbing.

Michael searches for holds. Hint: start on the the good rock to climber’s right of the chimney.
Michael leads the route and gasps as we exit on the summit ridge. Before us is a rocky plateau leading toward Williamson’s east and west “horns”. From the floor of the Owens Valley the horns appear to be the summit of the mountain. In actual fact the true summit is further west and much more subtle.

Sweeping the chimney.

The horns of Williamson.
We swing right and up the ridge. After about 15 minutes of Class 2 scampering and boulder hopping we arrive at the summit! The views from the top of Williamson do not disappoint, as every California 14er save Shasta is visible.
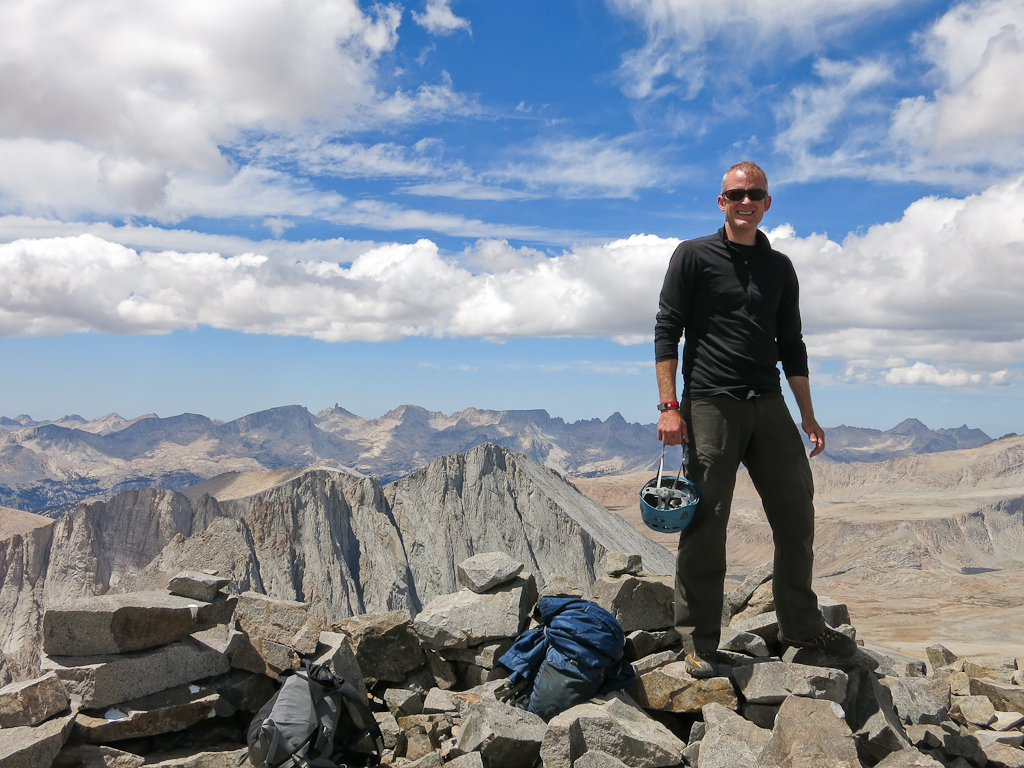
First 14er of the year and it’s a pretty good one.

A rare view from this angle: Langley, left, Russell, center-right, and…that other mountain.
As we begin our descent we catch site of two guys emerging from the chimney and Michael shouts greetings and an advisement as they errantly begin heading toward the horns. A shouted conversation ensues and they tell us they’re day hiking the two peaks from the trailhead!
The racer in me feels a pang of envy as our noble effort to attempt the one peak from Anvil is completely eclipsed by this seemingly mad endeavor. Turns out the tactic is not uncommon and I soothe my ego by speaking the truth to myself about the matter: 20 or so hours straight of hiking and climbing 30 miles with 10K’ of gain, while an amazing feat of endurance, is just not my idea of a fun day in the mountains.
My envy sufficiently quelled, we continue the descent. Other than the fact that I find the way down the chimney a little trickier than the way up, the descent is uneventful if a little sloppy on my part. Michael shows off his boulder hopping agility and arrives at the base of the gully several minutes before me. From there we retrace our path out of the bowl, down the pass and back to Anvil.
Down the chimney Michael goes with a bound.
This has not been my hardest day in the mountains, but the cumulative toll of the route lives up to its reputation. A climb of Williamson demands respect strictly as an endurance event. Ironically, even though I am pretty blasted by two days of grinding, I struggle to sleep well—worse than normal—for reasons that are unclear.

Red clouds over the ridge, from Anvil.

The GPS may wander but we stay true to the route.
Day 3: Oh, and Tyndall…
Another nice day and knowing that Tyndall will be a comparative breeze we depart camp at a leisurely 8am. The hike up Shepherds is pleasant and we harbor no regrets having to climb the 2K’ again as it serves a great warm up.
Groundhog’s Day on the pass.
Though the “Class 2” Northeast Ridge is officially considered the standard route up the mountain I have read nothing but bad things about the route and so we never even consider it as an option. In fact I would like to officially nominate the North Rib route as the new standard. Anyone know where to submit the forms?
Michael and I stand at the top of the open slope and scout our proposed route. There is a moraine at the base of the rib. To the right of the moraine is a boulder field leading to shallow gully, carpeted by dusty orange rocks. Any route would seem to suffice but we choose the gully, working up and left over the top of the moraine to the base of the rib.

The moraine, shallow gully and Tyndall’s North Rib.

Approaching the rib on the dusty orange rocks of the gully.
From the base of the rib to the summit ridge is less than 1,000 feet and the effort is similar to the Williamson gully at Class 2+, though shorter and so not nearly as demanding. Again the trick is to climb the blocky talus and slabs of the rib itself as opposed to looser stuff on the right. There is a gendarme at the top of the rib and we use it as a target to assist navigation.

Michael leads the assault on the rib, using the gendarme seen above as a target.

And up…

…and up, approaching the gendarme.
Just short of the summit ridge we lose the route a bit and end up climbing the fun Class 3 blocks which make up the base of the gendarme. The correct (but less fun) route would be to cross over the rib, working left, into an obvious chute that passes the gendarme to the left. After our scrambling fun has played out we correct our trajectory, climb the remaining portion of the chute and arrive on the summit ridge.
Oops: a good bit of off-route fun.
The scampering traverse to Tyndall’s exposed summit is simple and direct, excepting the contouring of a minor false summit along the way.

Approaching the summit block. Watch your left: that first step is a doozy.
We arrive at the summit, dropping into the small dirt-floored cavity that houses the register. There is a block of rocks that serve as the pinnacle of the mountain, dividing two windows that look down nearly 2,000’. The exposure of these two windows is so profound that as I sit only a couple feet from the precipice my nether regions tingle and not in a good way.

Michael contemplating the air of the summit pinnacle. Or offering thanks to the creator, whichever works for you.
Michael and I take turns mantling to the top of the block and touching the pinnacle. We muse about how if this stone were in our in the backyard we could literally do a handstand on the thing and not even give it a second thought. As is it, since a mere gust of wind could send the perpetrator of such a feat flipping arse-over into the airy void, I cling to the thing for dear life and feel little silly for my cowardice.
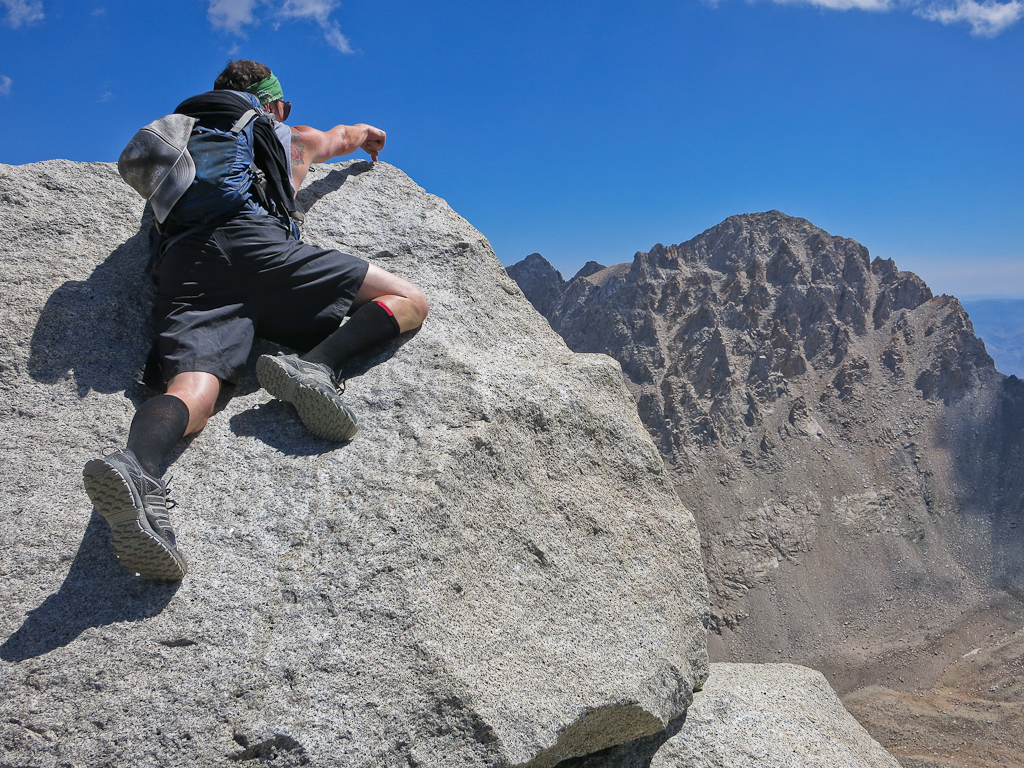
Touching the summit pinnacle makes your nether regions tingle.

Williamson across the void. We wouldn’t believe it climbable if we hadn’t done it the day before.
We find a slightly less daring perch on the west side of the summit, eat and relax in the Sierra sunshine for a good duration. The descent off the mountain is quick and unremarkable, other than the fact that Michael again torches me down the talus.
Arriving back at the intermediary slope we pause for pictures. We’ve done it!

Success!

One last look of the glowering West Face of Williamson.
Rather than hang out back at Anvil, we decide to pack up and cut our final day’s descent in half by packing down (and back up) to camp at Symmes Saddle. A short pack out will await for Day 4, along with a handsome breakfast in Lone Pine and the drive back to greater LA.

Moon and freakish cloud above Williamson’s East Ridge at dusk.
We talk openly of next year’s trip to finally tackle Sill & Polemonium. My deadline to become a proficient technical rock climber and rope handler is 361 days away and counting. I better get started…

There and back again.


